Tuesday, May 31, 2011

DO Pilgrims of the Flying Temple Part 6

The embossing and dying is done and now need start to pull it all together. This is going to be a Japanese or Stab binding so it will not have a traditional spine. Rather it will be sewn together through holes "stabbed" through the cover and pages. Youtube  is full of great example of how to do a stab binding if you are looking for a more detailed description.

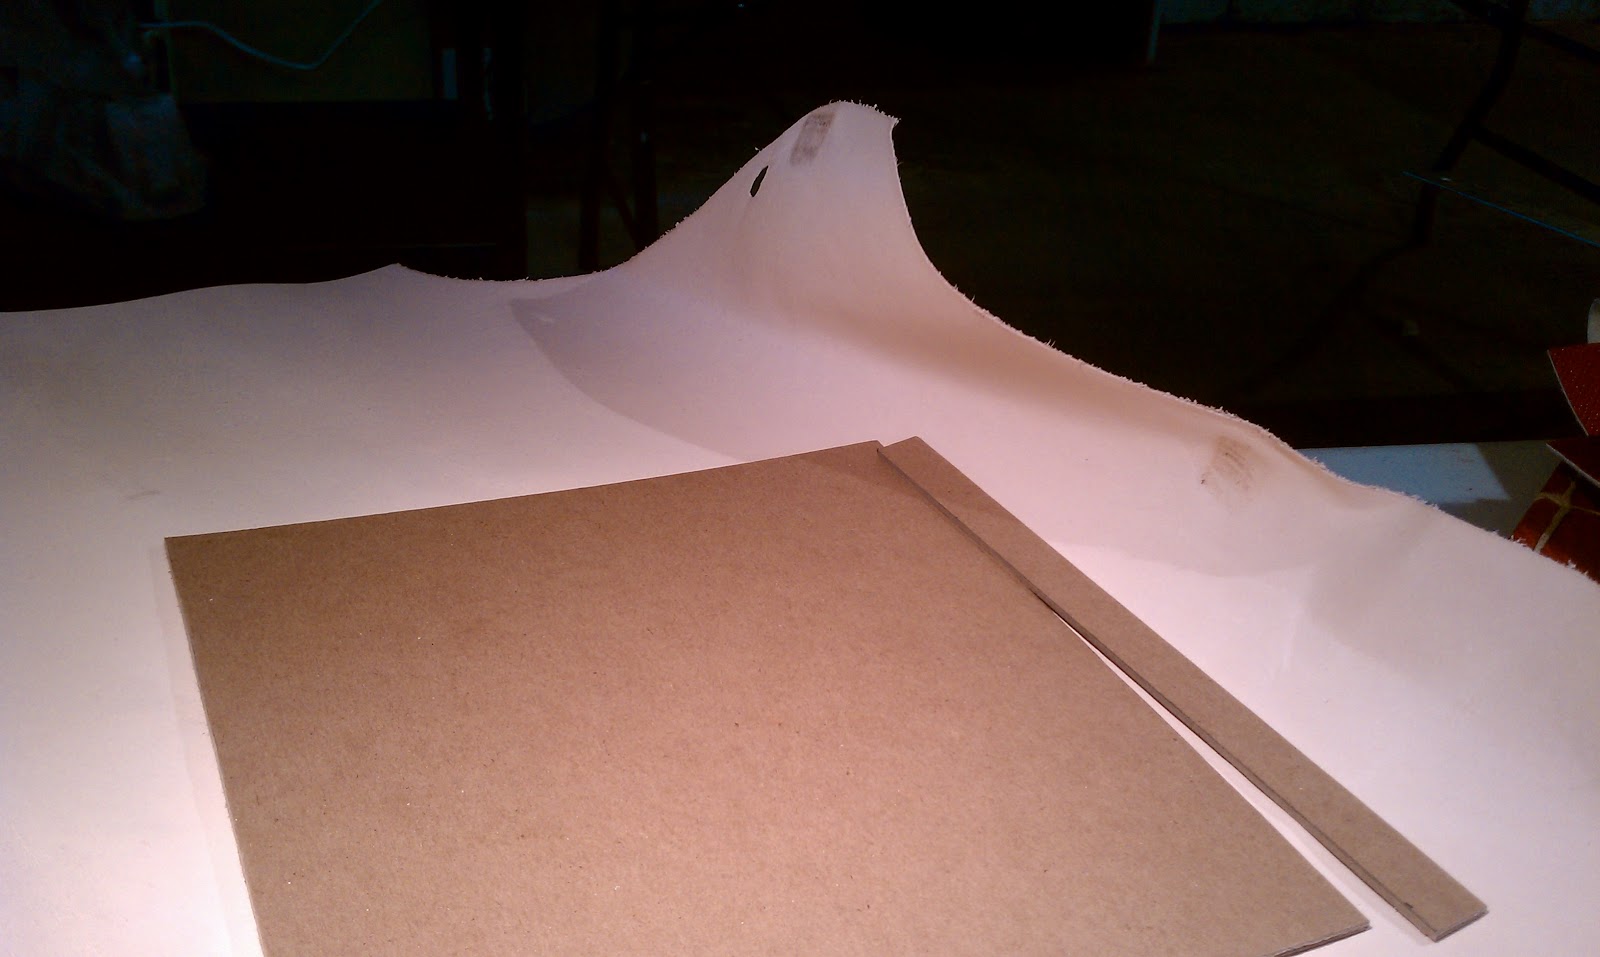
I have printed out a pdf of the preview copy so I can work out the final design. The final product will use the final print version with the spine cut off.


One of my newest tools is a heavy duty guillotine paper cutter. If this is something you want to do on a regular basis I suggest you pick one up. If not you can go to a Kinkos  to have them do even spin cuts or with a steady hand, a sharp Exacto, and a strait edge you can cut through the layers by hand. I used my cutter to square my printout to 8.5x8.5.


Making sure that your holes line up and every thing is square is critical to making sure things comes out even at the end. I start by making the holes on one of the covers and using that as a template for everything else.

Using a leather punch I put a hole strait through to the other side. I then clamp the back cover to the front and punch through the back cover.Now the front and back cover have aligned and even holes.
 I then line up the sheets and clamp the front cover to them. With a sharp pencil I mark the sheets below.

 Very carefully remove the cover, keeping the pages clamped together. The pages are too thick to punch through so it is off to the drill press. My second most valuable tool is my Dremel with the drill press stand as an added option. You can attempt this without using a drill press but it is very difficult to keep the hole straight without one. When drilling through sheets of paper be careful not to go too deep too fast or you sheets will catch on fire.


Next time we sew it all together and put on the final touches.....

Tuesday, May 24, 2011

DO Pilgrims of the Flying Temple Part 5

Now we move on too dying the leather. Below is a picture of some of the products I use, Eco-Flo and Fiebing's leather dye. Both are water based so they dry very quickly. The Eco-Flo is thicker and is much better for blending with other colors and can create  more natural patters and streaks. The Fiebing is very good at even penetration and can produce a very even coloring. I tend to prefer the eco-flo because its ability to blend with other colors and it pools well on the embossed leather providing added depth. For this project I used a single light tan eco-flo dye.


With all dyes the longer it sits on the leather the deeper it will penetrate and the darker it will be. When applying dye you want to apply it with a soft cloth in a circular pattern for an even distribution of color. To ensure the dye penetrated into the embossing I apply a heavy coat and lightly wipe away the excess. 


Once your project is dyed you need to seal it. water based dyes will run if you get them wet. While it can be a cool effect it is annoying to get covered in ink every time it rains. There are several ways to seal leather and I have pictured a few below. Eco-Flo has a water based sealant that will produce a satin finish, Fiebing makes a liquid wax the can be polished to a high shine, or you can just use bee's wax and some elbow grease. For suede and pre-dyed leather I also use a spray sealant the you would use to seal leather boots.

 My personal favorite and the one I use 90% of the time is the Atom wax. It is easy to apply, dries quickly, and can be polished to various levels of shine. Also depending on how long you let the dye dry before applying you can produce some nice aging effects.
 For this project I applied two coats of the wax letting it dry between applications and I made sure the dye was very dry. If you apply it when the dye is still drying you will get a streaked effect that I wanted to avoid with this project. Once the wax dries I used a soft rag and some elbow grease to polish the surface to a medium shine.

Next time we talk binding and pulling it all together...

Saturday, May 21, 2011

DO Pilgrims of the Flying Temple Part 4

So now that I have transfered the image to the leather we need to score the leather. When you emboss leather it needs a place to go. By making a swallow cut around your image it will allow you to press the leather down, raising your image above the surface. Wetting the leather as you work will also make the leather more supple and prevent the leather from pulling or distorting.


So lets talk tools. For thick leather you often use a series of stamps and hammer your design into the leather.  Since this leather is very thin and the design is very detailed I use some simple tools with different beveled edges to shape the leather. There are many places on line that carry leather working tools but Tandy Leather has a wide range if you can't find them else where.


The front design is all image but the back design is going to be a letter written to the pilgrims of the flying temple. The letter I chose was written by an little girl from a very small planet, so I recruited my nieces to help. They wrote the letter and drew the picture and I transfered that to the leather.


The process for transferring text to the leather is the same as before  but instead of cutting around the image I cut the letters into the leather. I then used the embossing tools to press the letters into the leather.


Coming in part 5 adding a little color to your work...

Thursday, May 19, 2011

DO Pilgrims of the Flying Temple Part 3

OK, the major cuts are done so now we can pull it all together and start embossing. Fair warning if you don't want the final product to be spoiled read no further. Starting with this post and going forward some of the final design will be reveled.

So now we have our snake skin boarder we need to re-attach it to the cover. Because of the fabric backing on the snake skin and the fair amount of bending and tension it is going to endure I attach it with a quick setting two part epoxy. This can be picked up in any hardware or craft store. Any brand will work and I prefer the kind that sets in 5 min.

In part two, when cutting the boarder, I cut through both the snake skin and the veg tanned leather. I did this so when re-applying the boarder it would sit flush with the veg tanned center. In the picture below the veg tanned center has been dyed a light tan but I will cover the dying process in a later chapter.

All that is left is to flip it over and trim the snake skin that was purposely cut bigger than the cover. With a strait edge I trim each side to an even two inches. To ensure the sides can be folded over and form a clean corner you need to cut each corner off. I built a jig to do this but with careful cutting you can do this by hand. The cuts should be at a 45 degree angle spaced a distance from the corner equal the thickness of the cover. Once trimmed up all that you need to do is glue it down, put it under some weight and give it few hours to dry.


Now the boards are ready to start embossing. First I need to transfer the artwork I want on the cover. For this you have to get in your way back machine and find some carbon paper. You can order it online from office supply stores but your better art stores will carry it as well. The art for the front cover was put together from a few different pieces of art the were done for the book. I chose them because they fit the letter that will be on the back cover, but more on that later. Below is the carbon transfer onto the leather and was done by just tracing the image with hard edge, It will be a little smudgey but this is OK the precision will come next.


Coming in part 4, putting knife to leather and making your first impression...

Wednesday, May 18, 2011

DO Pilgrims of the Flying Temple Part 2

So planning is over so now starts the work. The design is going to consist of a large un-dyed  1-2  weight vegetable tan leather center which will be stained and embossed surrounded by a red snake (dragon) skin boarder. Because of the size of the area I needed to cover with the snake skin I had to go with a synthetic leather but I found a great product and it really simulates the texture and look of real snake skin.  link to fake snake skin provider

But first thing first. The backing is 1/8 Davey board. Davey board is the most common form of cardboard backing for book binding and can be found at most decent art stores. For this book the page dimensions are 8.5 x 8.5 so I cut the board 1/8 bigger so there is a overlap of the page affording them some protection.  the final dimensions are 8.5x8 3/4. The width is a little shorter because of the 1/4 gap that will allow the book to hinge open. to make that hinge I cut a 1/2 inch strip off the short side. See image below

I repeat this process again for the back cover.

Next I glue the board to the veg tanned leather and trim it to same dimensions of the board. I just use strait Elmers glue. To be official you can get a product called PVA for this but it is considerable more expensive and unless you are looking to archive you books for 100 years I don't recommend the added expense.


next we need to attach the snake skin on top of the veg tanned leather. We are going to attach a piece bigger book, about 3 inches over on each side. Since we need to emboss the center we only want to apply glue in 1/4 strip around the edge of the veg tanned leather. This just a temporary glue that will allow us hold everything in place so we can measure and cut it.

Now place some heavy books on it and leave it alone for a few hours. Once set I folded each edge under the stack and drew a line about a 1/2 inch in on each side. I use a grease pencil because it is easily removed from the snake skin.

Next I cut along the lines with a very very sharp Exacto. Any dullness will pull the leather and you will not get a straight cut. When you cut it it needs to go through the snake skin and the veg tanned leather below it. Be careful not to cut through under lying Davey Board.


Next entry putting it all together so we can start embossing....

Tuesday, May 17, 2011

DO Pilgrims of the Flying Temple Part 1

So recently I was asked produce a custom book as a reward level for the kick start RPG  Do Pilgrims of the Flying Temple and I jumped at the chance. Love this hobby and was very excited to help out with this project. It also gave me an excuse to start a blog to track my progress and share with anyone who might be interested.

So as my premier post I give you a snap shot of some of the raw material I will be using for the project.

 The book is still in final editing so it will be some time before I get the actual pages to bind but the final dimensions 8.5x8.5 so cover design can begin now. Because I don't have the final page count and because of the Asian theme I landed on  Japanese binding. Here are a couple of books I did with a Japanese binding for those not familiar with the term.

 
Part 2 - Cut Cut and more Cuts....